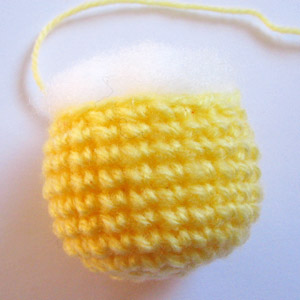
R1:6 sc in magic ring. (6 st)
R2:2 sc in each stitch around. (12 st)
R3:(2 sc in next stitch, sc in next) 6 times (18 st)
R4:(2 sc in next stitch, sc in next 2 st) 6 times (24 st)
R5:(2 sc in next stitch, sc in next 3 st) 6 times (30 st)
R6:(2 sc in next stitch, sc in next 4 st) 6 times (36 st)
R7:(2 sc in next stitch, sc in next 5 st) 6 times (42 st)
R8:(2 sc in next stitch, sc in next 6 st) 6 times (48 st)
R9-13: 1 sc in each stitch around (48 st)
R14-15:Change to CC 1 sc in each stitch around (48 st)
If you’re using two-piece animal eyes, you should insert them now. I put
mine between rounds 8 and 9 about 9 stitches apart. The eyes should be
on the opposite side of the head from where you begin each round.
R16-31:Change back to MC 1 sc in each stitch around (48 st)
If you’re going to make the arm joints using two-piece animal eyes, you should make the arms now and then attach them to the body
with the eyes before you start stuffing your Android. If you’re going
to thread-joint the Android’s arms then you should stuff the Android
almost full now and then continue closing him up.
R32:(invisible decrease, 1 sc in next 6 st) 6 times (42 st)
R33: (invdec, sc in next 5 st) 6 times (36 st)
R34: (invdec, sc in next 4 st) 6 times (30 st)
R35: (invdec, sc in next 3 st) 6 times (24 st)
R36: (invdec, sc in next 2 st) 6 times (18 st)
R37: (invdec, sc in next 1 st) 6 times (12 st)
R1: sl st in 2nd chain from hook and in each remaining chain. (4 st)
Cut yarn, leaving a long yarn end. Draw end through last loop and pull tight to fasten off.
Sew on to the top of the Android head. The left antenna should line up
with the inside corner of the left eye, the right with the inside corner
of the right eye.
Arms (Make 2)
With MC make a magic ring.
R1:6 sc in magic ring. (6 st)
R2:2 sc in each stitch around. (12 st)
R3-13:1 sc in each st around (12 st)
If you are making the Android with two-piece animal eyes then now is the
time to put the front of the eye in the arm and attach it to the body.
(Which you left open at R31)
After you attach the arm to the body, stuff the arm.
If you aren’t using the two-piece animal eyes for joints, then disregard
the eye-joint instructions and just stuff the arm. (The arm should be
about 6.5 cm long.)
R14: (invdec) 6 times (6 st)
Fasten off. Stitch the hole closed and weave in the end of the yarn.
Once you’ve made both arms, you can attach them to the body by thread-jointing them on. I put my Android’s arms a little too high. They should be attached below the white line around the Android’s neck.
Legs (Make 2)
Option 1
The first option for the legs is to make your Android stand. To make
these you need the weighted stuffing and the plastic canvas. You might
also need the toe-ends of a pair of stockings if you want to make sure
the plastic pellets don’t fall through the holes between the stitches in
the legs.
With MC make a magic ring.
R1:6 sc in magic ring. (6 st)
R2:2 sc in each stitch around. (12 st)
R3:(2 sc in next stitch, sc in next) 6 times (18 st)
R4-10:1 sc in each stitch around (18 st)
Fasten off, leaving a long yarn end. Cut a piece of plastic canvas to
make a flat base for the Android’s foot. Put the canvas in the bottom of
the foot. Stuff the leg with weighted stuffing. If you don’t put the
pellets in the toes of the tights or in sewing bags, then put a little
fiberfill stuffing in over the top of the pellets to keep the pellets
from escaping while you sew the leg to the Android body.
When you’ve made both legs, sew the legs to the body. They should be in the middle of the base of the body about 2 cm apart.
Legs (Make 2)
Option 2
If you don’t want your Android to be able to stand on his own, then you
can make the legs look more like the real Android legs. For these legs
you just need ordinary fiberfill stuffing instead of the weighted
stuffing. (The legs should end up being about 3 cm tall.)
With MC make a magic ring.
R1:6 sc in magic ring. (6 st)
R2:2 sc in each stitch around. (12 st)
R3-7:1 sc in each st around (12 st)
Fasten off, leaving a long yarn end. Stuff the legs and sew them on. They should be in the middle of the base of the body about 1 cm apart.
Head: make 1 piece with your choice of yarn color. Work from top to bottom.
Rnd1: Make magic ring and 6sc in ring (6)
Rnd2: 2sc in each st around (12)
Rnd3: *Sc in next st, 2sc in next st*, repeat * around (18)
Rnd4: *Sc in next 2 st, 2sc in next st*, repeat * around (24)
Rnd5: *Sc in next 3 st, 2sc in next st*, repeat * around (30)
Rnd6: *Sc in next 4 st, 2sc in next st*, repeat * around (36)
Rnd7-14: Sc in each st around (36)
Rnd15: *sc in each of next 4 st, dec 1*, repeat * around (30)
Rnd16: *sc in each of next 3 st, dec 1*, repeat * around (24)
Rnd17: *sc in each of next 2 st, dec 1*, repeat * around (18)
Rnd18: *sc in next st, dec 1*, repeat * around (12), finish off with a long tail for sewing.
Stuff polyester firmly.
Body: make 1 piece with your choice of yarn color. Work from bottom to top.
Rnd1: Make magic ring and 6sc in ring (6)
Rnd2: 2sc in each st around (12)
Rnd3: *Sc in next st, 2sc in next st*, repeat * around (18)
Rnd4: *Sc in next 2 st, 2sc in next st*, repeat * around (24)
Rnd5-10: Sc in each st around (24)
Rnd11: *sc in each of next 2 st, dec 1*, repeat * around (18)
Finish off with a long tail for sewing. Stuff polyester firmly.
Wings: make 2 pieces with your choice of yarn color.
Rnd1: Make magic ring and 6sc in ring (6)
Rnd2: 2sc in each st around (12)
Rnd3: *Sc in next st, 2sc in next st*, repeat * around (18)
Rnd4: Sc in each st around (18)
Finish off with a long tail for sewing (as shown in the photos).
Mouth: make 1 piece with your choice of yarn color.
Rnd1: Make magic ring, 8sc in ring (8) and join with slst.
Finish off with a long tail for sewing.
Legs: make 2 pieces with your choice of yarn color.
Rnd1: Make magic ring, 10sc in ring (10) and join with slst.
Finish off with a long tail for sewing.
Finishing: Install plastic eyes, sew mouth to the head.
Sew head to body, then wings and legs.
Glue the ribbon to the neck.
Salam,
ada la sorg akak opis nie mintak kopiah budak tp tak menyempat2 nak try buatnya..jumpa je patern simpan dulu kat blog nie..... bila la kan nak cuba
Material:
hook size
benang
saiz: kanak-kanak 7-10 tahun
note:
dc-double crochet
sc-single crochet
ch-chain
(setiap
kali habis satu round, slip stitch pada atas sc/dc di permulaan round,
dan chain 1 (single crochet) atau chain 2(double crochet). sc/dc pada
stitch yang sama untuk memulakan round baru)
Salam,
aku dah jadi penternak arnab berjaya skang nie...tapi arnab nie tak boleh di makan...cubit-cubit....picit-picit jek boleh....agak-agak tengah geram ke kan boleh aa tempat melepas geram cam mak nini (terpengaruh cite shin chan).
Di bawah ni adalah arahan buatnya mcm mana.....
ukuran asal adalah size 9 inci panjang dan 8*1/2 inci keliling.
Tapi dia jenis yang boleh mengembang macam stokin.
Untuk size yang lebih besar boleh guna double benang dan guna size jarum K hook, atau tambah rows. 2 lagi rows di bhgn toe dan 2 rows di bhgn heel.
Untuk size kecil pula boleh guna size hook yang kecik sikit spt 3 mm atau 4 mm .
selamat mencuba...!!!
Round 1: Chain 4, 11 double crochet in 4th chain from hook, join with slip stitch around beginning chain 3 .
Round 2: Chain 3, 1 double crochet in same space, 2 double crochet in top of remaining 11 stitches of this round, join with slip stitch around beginning chain 3.....(24 stitches for rest of pattern at the completion of each round or row). Round 3: Chain 3 *front post double crochet around next double crochet, double crochet in top of next double crochet,repeat from * slip stitch around beginning chain 3.... Rounds 4- 11: Repeat round 3.............
From this point you will work in rows....
Heel Section..this part is worked in rows..
(you will have 23 stitches for entire heel section) Row 12: Chain 3, * front post double crochet around next double crochet, double crochet in top of next double crochet,repeat from *, end with a double crochet in top of the last plain double crochet, leaving the last front post double crochet unworked. turn.... Row 13: Chain 3 *back post double crochet around next double crochet, double crochet in top of next double crochet, repeat from* to chain 3, double crochet around the chain 3, turn.... Row 14: Chain 3*front post double crochet around next double crochet, double crochet in top of next double crochet, repeat from* to chain three, double crochet around the chain 3, turn.... Row 15-20: Repeat rows 13 & 14....
Slip Stitch your slipper together.
You will now turn it so that you will work this round; around the ankle.
Chain 2, work a half double crochet in each space around the ankle section. Slip stitch together.
Leaving a long enough length of yarn to sew the heel of your slipper together, cut the yarn.
Sew the heel together, tuck in ends.
Make second slipper. For Ties: Chain 50, slip stitch to middle stitch at the ankle on back of slipper, chain 52 stitches, cut yarn and pull it through the last chain.
Trim the ends of yarn on the ends of the chain.done.....
Size child 2+
Hook size 4.00 mm. US G/6
Yarn, 8 ply. US 4 ply
Sewing needle
US terms used through out pattern
St’s used:
Sl st = slip stitch
Ch = chain
Sc=single crochet
Rsc= reverse single crochet
Dc= double crochet
Skill= beginner
Beginning at top of the hat:
Special notes: the 1 sc and ch 1 is the first dc of each round
Ch 5, join with sl st to first ch to form a ring,
Increases:
Row 1: work 1 sc into ring and ch 1 (this is the 1st dc), work 11 dc into the ring, join with a sl st, into the ch 1, (12 dc)
Row 2: work 1 sc and ch 1 into same space as the join, work 1 dc in same space, work 2 dc’s in each dc around, join with a sl st, into the ch 1, (24 dc)
Row 3: work 1 sc and ch 1 into same space as the join, work 2 dc in next dc, *work 1 dc in next dc, work 2 dc in next dc,* repeat from *to* to end, join with a sl st, into the ch 1, (36 dc)
Row 4: work 1 sc and ch 1 into same space as the join, work 1 dc in next dc, work 2 dc in next dc, *work 1 dc in each of next 2 dc, work 2 dc in next dc,* repeat from *to* to end, join with a sl st, into the ch 1, (48 dc)
Row 5: work 1 sc and ch 1 into same space as the join, work 1 dc in each of next 2 dc, work 2 dc in next dc, *work 1 dc in each of next 3 dc, work 2 dc in next dc,* repeat from *to* to end, join with a sl st, into the ch 1, (60 dc)
Row 6: work 1 sc and ch 1 into same space as the join, work 1 dc in each dc to end, join with a sl st, into the ch 1 (60 dc)
Row 7 to 10: repeat row 6. You can make your hat longer in length by adding more repeat rows of row 6
Adding the ear flaps:
Mark out your 10 dc’s on each side of the hat for the ear flaps as per video tutorial
First ear flap:
Row 1: join in yarn with a sl st and ch1, in same space work 1 sc and ch 1, work 1 dc in each of the next 9 dc, turn, (10 dc)
Row 2: work 1 sc and ch 1 into first dc of the row, work 1 dc in each of the next 8 dc, work 1 dc into the ch 1 space, turn, (10 dc)
Row 3: to Row 5: repeat row 2, finish off
Second ear flap:
Line up your 10 dc’s on opposite side to 1st ear flap and repeat above instructions to complete 2nd ear flap
Border: Turn hat upside down and join yarn to hat edge
Row 1: join in yarn with a sl st and ch 1, work a rsc around hat edge, see video for full instructions
Make Plaits: See video tutorial for full instructions
Making the Owl Eye’s: 4 colors needed…Make 2
Ch 5, join with sl st to first ch to form a ring,
Increases:
Row 1: (black) work 1 sc into ring and ch 1 (this is the 1st dc), work 11 dc into the ring, join with a sl st, into the ch 1, (12 dc) change color
Row 2: work 1 sc and ch 1 into same space as the join, work 1 dc in same space, work 2 dc’s in each dc around, join with a sl st, into the ch 1, (24 dc) change color
Row 3: work 1 sc and ch 1 into same space as the join, work 2 dc in next dc, *work 1 dc in next dc, work 2 dc in next dc,* repeat from *to* to end, join with a sl st, into the ch 1, (36 dc), finish off leaving a long tail to sew eye onto hat
Eye Lashes: Worked across opposite arch to the long tail
Row 1: join in yarn with a sl st and ch1, work 1 dc in next dc, work 2 dc in next dc, work 1 dc in each of the next 2 dc’s, *work 2 dc in next dc, work 1 dc in each of the next 2 dc’s,* repeat from *to* approx 2 more times for width desired
Attach Eyes:
Lay hat flat and sew on eyes to front of the hat in an even manner
See video tutorial for color choices and eye placement
Faundation Ring :
6 ch and join with sl st to form a ring
Round 1:
2 ch, 23 dc round into the ring, close with a sl st(total of 24 dc)
round 2:
4 ch (count as 1 dc +2 ch) 1 dc in the closing sl st of the previous row
1 ch * skip 2 ch, in the next ch : 1 dc, 2 ch, 1 dc, 1 ch * reapeat 7x from * to *. Close round with a sl st in the 2nd ch(of4) of the start.
Round 3:
2 ch(counts as 1 dc), 1 dc, 2ch, 2 dc under the 2 ch of the previous row, 1 sc under the 1 ch * 2 dc, 2 ch, 2 dc as before, 1 sc as before *. Reapeat 7x from * to *. Close with a sl st in 2nd ch (of 2) of the start.
Round 4:
No build up with ch as before, directly 3 dc, 1 ch, 3dc under the 2 ch of the previous row, 1 sc to the left and right of the sc of the previous row. Reapeat 8x and close with a sl st in the 1 st ch of the previous row.
Kasut baby la pulak kan....nak save dianya link je nie...kasutnya tgh dalam proses...semalam baru dapat sebelah so hari ni sambung lagi sebelah...dah siap kang upload sini...
link dia supaya tidak lupa Part 1 Part 2 Part 3
belum try lagi patern bunga nie.....tapi save dulu la kan dianya patern....kang nak buat senang....
1st roundCh1, work 15sc into circle. Ss into first ch. 2nd roundCh4, * skip 1sc, 1dc into next sc, ch1, rep from * 6 times more. Join with a ss into the 3rd of the first 4ch. Break off the first color. 3rd roundJoin the color you wish to use for the petals to first ch loop with a ss, ch1. Into same ch loop, work 1dc, 1tr, 1dc, 1sc, * into next ch loop, work 1sc, 1dc, 1tr, 1dc, 1sc, rep from * into each ch loop, making 8 petals. Join with a ss into first ch. 4th round Working behind the petals made in the 3rd round, make ss between 2 petals, ch 4, * 1sc between next 2 petals, ch3, rep from * to end. The ch loops made lie behind the petals of the previous row. Join with a ss into first ch. 5th round Make the next row of petals by working 1sc, 1dc, 2tr, 1dc, 1sc into each ch loop. Join with a ss into first sc. 6th round Working again behind the petals made in the previous round, make ss between 2 petals, ch 5, * 1sc between the next 2 petals, ch 4, rep from * to end. Join with a ss into first ch. 7th roundInto each ch loop, work 1sc, 1dc, 3tr, 1dc, 1sc. Join with a ss into first sc. Fasten off, darn in ends, and voilà ...a pretty flower, all done! But beware, making them can be addictive...
ch = chain; dc = double crochet; lp = loop; rep = repeat; sc = single crochet; ss = slip stitch;tr = treble crochet.
Mari kita buat bunga rose....
nie adalah patern bunga rose. dah siap tinggal gulung dan jahit bawah dia.
Leaving a 10-12 inch tail, chain 41.
Row 1 - Dc in 4th chain from hook. Ch 2, 2 dc in same space. *Ch 1, skip 2 chains. In next chain 2 dc, 2 ch, 2 dc. Repeat from * to the end. Ch 1, turn.
Row 2 - Slip stitch into first ch 2 space. Chain 3, 6 dc in same space. *Sc in ch 1 space. 7 dc in next ch 2 space. Repeat from * to the end. Fasten off.
Thread the tail of yarn onto a needle. As you roll the piece to create the shape of a rose (Figure 1), stitch along the bottom (along the starting chain) where the wraps come together.
Rosebud
Use the same instructions for the rose above but start with a chain 12 for a small rosebud, chain 15 for a medium size rosebud, and chain 21 for a looser rosebud that is slightly open.


 Row 2 - Slip stitch into first ch 2 space. Chain 3, 6 dc in same space. *Sc in ch 1 space. 7 dc in next ch 2 space. Repeat from * to the end. Fasten off.