Cotton or Worsted Weight yarn
G size hook
tapestry needle, scissors
small button
9mm animal eyes
Note: This is not crocheted in a spiral; it is crocheted in individual rounds. Joining rounds normally gives a moving seam, so I chose to join my rounds using the No-Cut Join method as described by Planet June for a straight seam. The instructions here will include a short description, but head over to Planet June to see a full tutorial and videos on this joining method.
The instructions below are to create the owl shown above.
Body:
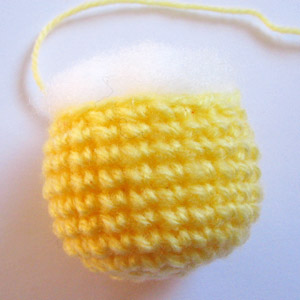
Round 1: Start with a magic circle. Work 6 SC into ring and join. (6 stitches) Round 2: CH 1. Work 2 SC into each stitch. Joining: Remove hook from last SC. Insert hook into first SC from back to front. Add loop from the last stitch onto the hook and pull through tightly. (12 stitches) Round 3: CH 1. Work 1 SC into current stitch (the one where you joined), then 2 SC into next stitch. *Work 1 SC into next stitch, followed by 2 SC in next stitch* around. Repeat no-cut joining method. (18 stitches) Round 4: CH 1. Work 1 SC into current stitch, and 1 SC into next stitch. Then work 2 SC into next stitch. *Work 1 SC into each of next 2 stitches, followed by 2 SC in next stitch* around. Join. (24 stitches) Round 5: CH 1. Work 1 SC into current stitch, and 1 SC into next 2 stitches. Then work 2 SC into next stitch. *Work 1 SC into each of next 3 stitches, followed by 2 SC in next stitch* around. Join. (30 stitches) Round 6: CH 1. Work 1 SC into each of 30 stitches around, starting with the current stitch (where you joined the previous round). (30 stitches) At the end of Round 6, change colors to create stripes. To join new yarn, I used Planet June’s Invisible Join method: after the last stitch, cut yarn leaving a tail, and pull tail through stitch. Insert hook into the 2nd stitch in the round from back to front under both bars and pull tail through. Then insert hook into last stitch in round from back to front through only the back loop and pull tail through. (It’s easier to watch the video.) Round 7-8: CH 1. Work 1 SC into each of 30 stitches around, starting with the current stitch. (30 stitches). Change yarn color. Round 9-10: CH 1. Work 1 SC into each of 30 stitches around, starting with the current stitch. (30 stitches). Change yarn color. Round 11-12: CH 1. Work 1 SC into each of 30 stitches around, starting with the current stitch. (30 stitches). Change yarn color. Round 13-15: CH 1. Work 1 SC into each of 30 stitches around, starting with the current stitch. (30 stitches). Join. Row 16: CH 1. Work 1 SC into next 15 stitches. CH 1. Turn. Row 17: Starting with the 2nd chain from the hook, SC 2 stitches together (sc2tog). Work 1 SC into each stitch in the row (11 stitches) until there are 2 stitches left. SC2tog the last two stitches. CH 1. Turn. (13 stitches) Row 18: Starting with the 2nd chain from hook, sc2tog, then work 1 SC into each of next 9 stitches. SC2tog last two stitches. CH 1. Turn. (11 stitches) Row 19: Starting with the 2nd chain from hook, sc2tog, then work 1 SC into each of next 7 stitches. SC2tog last two stitches. CH 1. Turn. (9 stitches) Row 20: Starting with the 2nd chain from hook, sc2tog, then work 1 SC into each of next 5 stitches. SC2tog last two stitches. CH 1. Turn. (7 stitches) Row 21: Starting with the 2nd chain from hook, sc2tog, then work 1 SC into each of next 3 stitches. SC2tog last two stitches. CH 1. Turn. (5 stitches) Row 22: Starting with the 2nd chain from hook, sc2tog, then work 1 SC into next stitch. SC2tog last two stitches. Do not turn. (3 stitches). Border: Work slip stitches down side of flap, around back of pouch opening and back up other side of flap. Make last slip stitch in the 3rd stitch of Row 22. CH 5. Slip stitch into 1st stitch of Row 22. Fasten off and weave in ends.
Eyes: (make 2)
Round 1: Start with a magic circle. Work 6 SC into ring. Join. (6 stitches) Round 2: CH 1. Work 2 SC into each stitch around. Join. (12 stitches)
Fasten off with long tail.
Finishing:
Push plastic eyes through a point between the 1st and 2nd rows of the
eye piece (not through center of circle). Using the tail and a
tapestry needle, attach eyes so that plastic eye is pushed through the
body, centered and between Rounds 12 and 13, counting from the bottom.
Push backing of plastic eye on securely.
Attach button to the center of the back of the body between Rounds 11 and 12, counting from the bottom.
Using a tapestry needle, create a beak centered right below the eyes.
Cut strands of leftover yarn and create the tufts using a lark’s knot where the body meets the flap.
Buat bakul buatan sendiri untuk kegunaan menyimpan benang-benang. Walaupun dah byk bekas menyimpan benang...tapi kenapa la asik tak cukup je kannn...hahhaa sendiri tau jawapannya.....asal ada org jual benang asik nak beli jew tu la padahnya. ambik ubat dah cam tokeh benang....
Materials
3 Skeins super bulky yarn (guna brand ice...lama beli benang besar nie tp tak tau nak buat apo)
Size L (8.0mm) crochet hook
Yarn needle
* kalau benang besar tak de boleh gak guna 3 helai benang biasa tu sekali je..lum cuba lg...sbb cam sayang benang nak guna sekali byk....
Measurements
smaller basket
8.5 inches in diameter
5.5 inches in height
larger basket
10 inches in diameter
10 inches in height
contoh gambar di atas tu buat larger basket....tak la large mana pun.....heee ok la kan buat simpan2 benang yg kita nak kait.
Pattern
Smaller basket
Ch 2 or magic ring
Rnd 1: 8 sc in 2nd ch from hook
Rnd 2: 2 hdc in each st. Join with sl st. (16 hdc)
Rnd 3: Ch 2, hdc in same st, hdc in next st, (2 hdc in next st, hdc in next st) around. Join with sl st. (24 hdc)
Rnd 4: Ch 2, hdc in same st, hdc in next 2 sts, (2 hdc in next st, hdc in next 2 sts) around. Join with sl st. (32 hdc)
Rnd 5: Ch 2, hdc in same st, hdc in next 3 sts, (2 hdc in next st, hdc in next 3 sts) around. Join with sl st. (40 hdc)
Rnd 6: Ch 2, hdc in same st, hdc in next 4 sts, (2 hdc in next st, hdc in next 4 sts) around. Join with sl st. (48 hdc)
The next round will be the first row of the body of the basket. You will be working into the back of each hdc.
Rnd 7: Ch 1, sc under the line or ridge on the back of the first st of
previous round. (Half double crochet stitches have a line or ridge on
the back of the stitch). You will be working under this line or ridge,
not into the regular loops.
This will leave the two loops of the stitch
creating a seam separating the bottom and body of the basket
Continue working sc around. Join with a sl st.
Rnd 8: Ch 2, hdc into next st and in each st around. Join with sl st.
Rnd 9: Ch 1, Working in the back loop only, sc in the same st and in each st around. Join with sl st.
Rnd 10: Ch 2, hdc in next st and in each st around. Join with sl st.
Rnd 11: Ch 1. Sc in same st and in each st around. Join with sl st.
Rnd 12: Ch 2, hdc in next st and in each st around. Join with sl st.
Rnd 13: Ch 1, working in back loops only, sc in same st, and in each st around. Join with sl st.
You will create the handles in rnd 14
Rnd 14: Ch 2, hdc in next 8 sts. Ch 7, skip the next 5 sts. Hdc in the
next 19 sts. Ch 7, skip the next 5 sts. Hdc in the next 10 sts. Join
with sl st
Rnd 15: Ch 1, sc in same st and in the next 8 sts. Work 8 sc under the
ch 7 space. (Do not work into the sts). Sc in next 19 sts. Work 8 sc
under the ch 7 space. Sc in next 10 sts.
Finish off with the no knot finishing method.
I have made a larger basket...I prefer the larger size (I'm in the process of adding the photos for the larger basket)
You will increase the bottom by one round.
Rnds 1-6: Refer to the instructions above
Rnd 7: Ch 2, hdc in same st. Hdc in next 5 sts. (2 hdc in next st, 5 hdc in next st) around, join with sl st. (56 hdc)
Rnd 8: Working under the line or ridge on the back of the hdc, sc in
each st around. This round creates the seam (described above)
I added 3 rows to the body of the basket for the larger size. (if you
need more detailed instructions for beginning and joining each round
refer to the details of each round for the smaller basket)
Rnd 9: Hdc round
Rnd 10: Sc round
Rnd 11: Sc round in the back loop only
Rnd 12: Hdc round
Rnd 13: Sc round
Rnd 14: Hdc round
Rnd 15: Sc round
Rnd 16: Sc in the back loop only
Rnd 17: Ch 2, hdc in the next 9 sts, Ch 9, skip 8 sts, hdc in next 20
sts, Ch 9, skip next 8 sts, hdc in next 9 sts. Join with sl st.
Rnd 18: Sc round, working 10 sc under the ch 9 spaces (not into each st). Join and finish off.
R1:6 sc in magic ring. (6 st)
R2:2 sc in each stitch around. (12 st)
R3:(2 sc in next stitch, sc in next) 6 times (18 st)
R4:(2 sc in next stitch, sc in next 2 st) 6 times (24 st)
R5:(2 sc in next stitch, sc in next 3 st) 6 times (30 st)
R6:(2 sc in next stitch, sc in next 4 st) 6 times (36 st)
R7:(2 sc in next stitch, sc in next 5 st) 6 times (42 st)
R8:(2 sc in next stitch, sc in next 6 st) 6 times (48 st)
R9-13: 1 sc in each stitch around (48 st)
R14-15:Change to CC 1 sc in each stitch around (48 st)
If you’re using two-piece animal eyes, you should insert them now. I put
mine between rounds 8 and 9 about 9 stitches apart. The eyes should be
on the opposite side of the head from where you begin each round.
R16-31:Change back to MC 1 sc in each stitch around (48 st)
If you’re going to make the arm joints using two-piece animal eyes, you should make the arms now and then attach them to the body
with the eyes before you start stuffing your Android. If you’re going
to thread-joint the Android’s arms then you should stuff the Android
almost full now and then continue closing him up.
R32:(invisible decrease, 1 sc in next 6 st) 6 times (42 st)
R33: (invdec, sc in next 5 st) 6 times (36 st)
R34: (invdec, sc in next 4 st) 6 times (30 st)
R35: (invdec, sc in next 3 st) 6 times (24 st)
R36: (invdec, sc in next 2 st) 6 times (18 st)
R37: (invdec, sc in next 1 st) 6 times (12 st)
R1: sl st in 2nd chain from hook and in each remaining chain. (4 st)
Cut yarn, leaving a long yarn end. Draw end through last loop and pull tight to fasten off.
Sew on to the top of the Android head. The left antenna should line up
with the inside corner of the left eye, the right with the inside corner
of the right eye.
Arms (Make 2)
With MC make a magic ring.
R1:6 sc in magic ring. (6 st)
R2:2 sc in each stitch around. (12 st)
R3-13:1 sc in each st around (12 st)
If you are making the Android with two-piece animal eyes then now is the
time to put the front of the eye in the arm and attach it to the body.
(Which you left open at R31)
After you attach the arm to the body, stuff the arm.
If you aren’t using the two-piece animal eyes for joints, then disregard
the eye-joint instructions and just stuff the arm. (The arm should be
about 6.5 cm long.)
R14: (invdec) 6 times (6 st)
Fasten off. Stitch the hole closed and weave in the end of the yarn.
Once you’ve made both arms, you can attach them to the body by thread-jointing them on. I put my Android’s arms a little too high. They should be attached below the white line around the Android’s neck.
Legs (Make 2)
Option 1
The first option for the legs is to make your Android stand. To make
these you need the weighted stuffing and the plastic canvas. You might
also need the toe-ends of a pair of stockings if you want to make sure
the plastic pellets don’t fall through the holes between the stitches in
the legs.
With MC make a magic ring.
R1:6 sc in magic ring. (6 st)
R2:2 sc in each stitch around. (12 st)
R3:(2 sc in next stitch, sc in next) 6 times (18 st)
R4-10:1 sc in each stitch around (18 st)
Fasten off, leaving a long yarn end. Cut a piece of plastic canvas to
make a flat base for the Android’s foot. Put the canvas in the bottom of
the foot. Stuff the leg with weighted stuffing. If you don’t put the
pellets in the toes of the tights or in sewing bags, then put a little
fiberfill stuffing in over the top of the pellets to keep the pellets
from escaping while you sew the leg to the Android body.
When you’ve made both legs, sew the legs to the body. They should be in the middle of the base of the body about 2 cm apart.
Legs (Make 2)
Option 2
If you don’t want your Android to be able to stand on his own, then you
can make the legs look more like the real Android legs. For these legs
you just need ordinary fiberfill stuffing instead of the weighted
stuffing. (The legs should end up being about 3 cm tall.)
With MC make a magic ring.
R1:6 sc in magic ring. (6 st)
R2:2 sc in each stitch around. (12 st)
R3-7:1 sc in each st around (12 st)
Fasten off, leaving a long yarn end. Stuff the legs and sew them on. They should be in the middle of the base of the body about 1 cm apart.
Head: make 1 piece with your choice of yarn color. Work from top to bottom.
Rnd1: Make magic ring and 6sc in ring (6)
Rnd2: 2sc in each st around (12)
Rnd3: *Sc in next st, 2sc in next st*, repeat * around (18)
Rnd4: *Sc in next 2 st, 2sc in next st*, repeat * around (24)
Rnd5: *Sc in next 3 st, 2sc in next st*, repeat * around (30)
Rnd6: *Sc in next 4 st, 2sc in next st*, repeat * around (36)
Rnd7-14: Sc in each st around (36)
Rnd15: *sc in each of next 4 st, dec 1*, repeat * around (30)
Rnd16: *sc in each of next 3 st, dec 1*, repeat * around (24)
Rnd17: *sc in each of next 2 st, dec 1*, repeat * around (18)
Rnd18: *sc in next st, dec 1*, repeat * around (12), finish off with a long tail for sewing.
Stuff polyester firmly.
Body: make 1 piece with your choice of yarn color. Work from bottom to top.
Rnd1: Make magic ring and 6sc in ring (6)
Rnd2: 2sc in each st around (12)
Rnd3: *Sc in next st, 2sc in next st*, repeat * around (18)
Rnd4: *Sc in next 2 st, 2sc in next st*, repeat * around (24)
Rnd5-10: Sc in each st around (24)
Rnd11: *sc in each of next 2 st, dec 1*, repeat * around (18)
Finish off with a long tail for sewing. Stuff polyester firmly.
Wings: make 2 pieces with your choice of yarn color.
Rnd1: Make magic ring and 6sc in ring (6)
Rnd2: 2sc in each st around (12)
Rnd3: *Sc in next st, 2sc in next st*, repeat * around (18)
Rnd4: Sc in each st around (18)
Finish off with a long tail for sewing (as shown in the photos).
Mouth: make 1 piece with your choice of yarn color.
Rnd1: Make magic ring, 8sc in ring (8) and join with slst.
Finish off with a long tail for sewing.
Legs: make 2 pieces with your choice of yarn color.
Rnd1: Make magic ring, 10sc in ring (10) and join with slst.
Finish off with a long tail for sewing.
Finishing: Install plastic eyes, sew mouth to the head.
Sew head to body, then wings and legs.
Glue the ribbon to the neck.
Dalam menghasilkan crochet terdapat 2 kaedah iaitu...arahan dan simbol.
selama ni aku lebih kepada arahan dan kurang faham dalam kaedah bacaan simbol.
Jadi aku letak simbol crochet ni sebagai rujukan aku nanti.
MEASUREMENTS
fits foot (approx) 8(9.5) cms / 3(4) ins
ABBREVIATIONS
St/s - stitch/es
rep -repeat
ch -chain
dc - double crochet (US Single crochet)
slst - slip stitch
tr - treble (US - double crochet)
htr - half treble
sp - space
dec - decrease (insert hook and draw up a loop, insert hook again into next stitch, draw up another loop, 2 loop on hook, draw through both loops.)
inc - increase ( work 2 dc into one st)
Create bootees
Sole is work in rounds not rows.
Using 3.5mm crochet hook (US E-4)(UK 9) and make 8(12) ch. 1st round - last 2ch count as 1tr, 3tr in 3rd chain chain from hook,*1tr in each following ch for the next 4(8) sts*, 7tr in last ch, rep * to *, 3tr in next ch, join with sl st to 2nd ch of beginning 2ch. 22(30) sts. 2nd round - ch 3(count as 1tr),1tr in same sp, 4tr in next st, * 1tr in each following st for the next 8(12) sts*, 4tr in next st, 3tr in next st, 4tr in the next st, rep * to *, 4tr in the next st, 1tr in same space as beginning 3ch, join with sl st to 3rd ch of beginning 3ch. 38(46) sts.
fasten off if want to change another color.
Note : This is now centre back of sole, mark with stitch maker or exess yarn.
BOOTEE UPPER
Note : 1st round only worked tbl (through back of loop / stitch) 1st round - 1ch(count as 1dc), 1dc in each st for next 14(18) sts, 2dc in next st, 1dc in each st for next 2st, 2dc in next st, 1dc in each st for next 13(17) st, join with sl st to 1st ch of beginning 1ch. 42(50) sts. 2nd round - 1ch (count as 1dc), 1dc in each st, join with sl st to 1st ch of beginning 1 ch. 3rd round - 3ch (counts as 1dc), 1tr in each st for next 16(20) sts, tr2tog 5 times, 1tr in each st for next 15(19) sts. join with sl st to 3rd ch of beginning 3ch. 37(45) sts. 4th round - 1ch (counts as 1dc), 1dc in each st for next 12(16) st, *dc2tog, 1dc, dc2tog*, 1dc in each st for next 3st, rep * to *, 1dc in each st for next 11(41) sts. 5th round - change yarn color, 1dc in each st for next 10(14) sts, 1htr, * tr2tog, 1tr* 3 times, tr2tog,1htr, 1dc in each st for next 9(13) sts, join with sl st to 1st ch of beginning 1ch. end
BOOTEE STRAP - strap is using rows not rounds.
Mark 6(10) sts each side of center back st along top bootee edge.
7ch, sl st into 1st ch to form ring, 8(12) ch,(with toe facing) 1 dc into marked st on left side facing, 1dc in each following st to next marked st, 1dc in market, 15(19) ch, turn, sl st into 7th ch from hook to form ring, 1dc in each ch, 1dc in each st back to first ring. end
Finishing
Using yarn needle sew in all loose ends inside bootee and on bootee straps. Using coordinating yarn sew on buttons below colored edging. Cross strap and mark position first.
Pattern for GRANNY WHITE HAT (in English) Yarn: Medium, worsted Needle: 4mm or 5mm (depending on how tight or loose you
crochet. For better results, check the suggested number for the yarn
you will use) Size: 4 yrs to adult Baby: skip rows 3 and 4 (for the rib part, you must have 36DC)
If you use baby yarn (fine), follow the instructions of a toddler size. Toddler size: skip row 4, and on the 5th row you must skip a st after the 3DC. For the rib part, you must have 48DC.
Ch = Chains
Sc = simple crochet DC = Double crochet FpSt = Front-post st BpSt = Back-post st Slst = slip stitch
Magic ring ( or ring of 4 chains) 1) 12DC on magic ring. 2) Chain 3 (counts as
first DC), and 1 DC on same st. Then
reperat: *2DC on each st * (Total: 24DC) 3) Chain 3 (counts as first DC). 2 DC on next st. Then follow this pattern all around: *1DC on
the next st, and then 2 DC together on the next st* (Total: 36DC) 4) Chain 3, and 1 DC in
next st. Then repeat all around: *2 DC +
2 DC on each st below* (Total: 48 DC) 5) Chain 3 (counts as first DC) , and DC on next 2
st. Repeat all around: *Chain 1, DC in
next 3 st* (Total: 48 DC and ch) End with sc on top of the first 3ch (This will leave
the st in place to start the granny
pattern on the following row. I do this
instead of the traditional way, which ends with a chain and slip st, and then
make slip sts until reaching the next chain-space.) 6-12> Chain 3 + 2 DC (on
the space below, between the group of 3 DC´s).
Now repeat the following all around: *Chain 1 + 3 DC on 1ch-space
below*, end with sc on top of the first 3 chains. 13>DC in each DC of prior
row and 1 DC in each chain 1 space (Total: 64 DC) (Total: 64 DC) 14-16> For the rib
part: Chain 2 (counts as first BpSt) + *
2 FpSt + 2BpSt* end with sl stitch, and cast off.
Patern nie beli kat etsy...memula memang susah nak faham arahan dia..baca banyak kali juga la. so setelah testing..buka..testing lg...berjaya juga menghasilkan arnab nie...
Salam,
ada la sorg akak opis nie mintak kopiah budak tp tak menyempat2 nak try buatnya..jumpa je patern simpan dulu kat blog nie..... bila la kan nak cuba
Material:
hook size
benang
saiz: kanak-kanak 7-10 tahun
note:
dc-double crochet
sc-single crochet
ch-chain
(setiap
kali habis satu round, slip stitch pada atas sc/dc di permulaan round,
dan chain 1 (single crochet) atau chain 2(double crochet). sc/dc pada
stitch yang sama untuk memulakan round baru)
Salam,
aku dah jadi penternak arnab berjaya skang nie...tapi arnab nie tak boleh di makan...cubit-cubit....picit-picit jek boleh....agak-agak tengah geram ke kan boleh aa tempat melepas geram cam mak nini (terpengaruh cite shin chan).
Salam,
agak lama tidak update blog nie....kemalasan melanda......huhuhu....hasil terkini ialah amigurumi . Ini pun buat sebab ada kawan mintak buatkan untuk promosikan kat blog dia....
Sangat jeles dengan bloger yang hari-hari update blog dia...tapi apakan daya nie jek aku termampu.......ada lagi orang tempah arnab nie...pastu bawak lerr gi opis..ropanya ramai yg berminat....abis semua cam jual pisang goreng.....
Di bawah ni adalah arahan buatnya mcm mana.....
ukuran asal adalah size 9 inci panjang dan 8*1/2 inci keliling.
Tapi dia jenis yang boleh mengembang macam stokin.
Untuk size yang lebih besar boleh guna double benang dan guna size jarum K hook, atau tambah rows. 2 lagi rows di bhgn toe dan 2 rows di bhgn heel.
Untuk size kecil pula boleh guna size hook yang kecik sikit spt 3 mm atau 4 mm .
selamat mencuba...!!!
Round 1: Chain 4, 11 double crochet in 4th chain from hook, join with slip stitch around beginning chain 3 .
Round 2: Chain 3, 1 double crochet in same space, 2 double crochet in top of remaining 11 stitches of this round, join with slip stitch around beginning chain 3.....(24 stitches for rest of pattern at the completion of each round or row). Round 3: Chain 3 *front post double crochet around next double crochet, double crochet in top of next double crochet,repeat from * slip stitch around beginning chain 3.... Rounds 4- 11: Repeat round 3.............
From this point you will work in rows....
Heel Section..this part is worked in rows..
(you will have 23 stitches for entire heel section) Row 12: Chain 3, * front post double crochet around next double crochet, double crochet in top of next double crochet,repeat from *, end with a double crochet in top of the last plain double crochet, leaving the last front post double crochet unworked. turn.... Row 13: Chain 3 *back post double crochet around next double crochet, double crochet in top of next double crochet, repeat from* to chain 3, double crochet around the chain 3, turn.... Row 14: Chain 3*front post double crochet around next double crochet, double crochet in top of next double crochet, repeat from* to chain three, double crochet around the chain 3, turn.... Row 15-20: Repeat rows 13 & 14....
Slip Stitch your slipper together.
You will now turn it so that you will work this round; around the ankle.
Chain 2, work a half double crochet in each space around the ankle section. Slip stitch together.
Leaving a long enough length of yarn to sew the heel of your slipper together, cut the yarn.
Sew the heel together, tuck in ends.
Make second slipper. For Ties: Chain 50, slip stitch to middle stitch at the ankle on back of slipper, chain 52 stitches, cut yarn and pull it through the last chain.
Trim the ends of yarn on the ends of the chain.done.....
Size child 2+
Hook size 4.00 mm. US G/6
Yarn, 8 ply. US 4 ply
Sewing needle
US terms used through out pattern
St’s used:
Sl st = slip stitch
Ch = chain
Sc=single crochet
Rsc= reverse single crochet
Dc= double crochet
Skill= beginner
Beginning at top of the hat:
Special notes: the 1 sc and ch 1 is the first dc of each round
Ch 5, join with sl st to first ch to form a ring,
Increases:
Row 1: work 1 sc into ring and ch 1 (this is the 1st dc), work 11 dc into the ring, join with a sl st, into the ch 1, (12 dc)
Row 2: work 1 sc and ch 1 into same space as the join, work 1 dc in same space, work 2 dc’s in each dc around, join with a sl st, into the ch 1, (24 dc)
Row 3: work 1 sc and ch 1 into same space as the join, work 2 dc in next dc, *work 1 dc in next dc, work 2 dc in next dc,* repeat from *to* to end, join with a sl st, into the ch 1, (36 dc)
Row 4: work 1 sc and ch 1 into same space as the join, work 1 dc in next dc, work 2 dc in next dc, *work 1 dc in each of next 2 dc, work 2 dc in next dc,* repeat from *to* to end, join with a sl st, into the ch 1, (48 dc)
Row 5: work 1 sc and ch 1 into same space as the join, work 1 dc in each of next 2 dc, work 2 dc in next dc, *work 1 dc in each of next 3 dc, work 2 dc in next dc,* repeat from *to* to end, join with a sl st, into the ch 1, (60 dc)
Row 6: work 1 sc and ch 1 into same space as the join, work 1 dc in each dc to end, join with a sl st, into the ch 1 (60 dc)
Row 7 to 10: repeat row 6. You can make your hat longer in length by adding more repeat rows of row 6
Adding the ear flaps:
Mark out your 10 dc’s on each side of the hat for the ear flaps as per video tutorial
First ear flap:
Row 1: join in yarn with a sl st and ch1, in same space work 1 sc and ch 1, work 1 dc in each of the next 9 dc, turn, (10 dc)
Row 2: work 1 sc and ch 1 into first dc of the row, work 1 dc in each of the next 8 dc, work 1 dc into the ch 1 space, turn, (10 dc)
Row 3: to Row 5: repeat row 2, finish off
Second ear flap:
Line up your 10 dc’s on opposite side to 1st ear flap and repeat above instructions to complete 2nd ear flap
Border: Turn hat upside down and join yarn to hat edge
Row 1: join in yarn with a sl st and ch 1, work a rsc around hat edge, see video for full instructions
Make Plaits: See video tutorial for full instructions
Making the Owl Eye’s: 4 colors needed…Make 2
Ch 5, join with sl st to first ch to form a ring,
Increases:
Row 1: (black) work 1 sc into ring and ch 1 (this is the 1st dc), work 11 dc into the ring, join with a sl st, into the ch 1, (12 dc) change color
Row 2: work 1 sc and ch 1 into same space as the join, work 1 dc in same space, work 2 dc’s in each dc around, join with a sl st, into the ch 1, (24 dc) change color
Row 3: work 1 sc and ch 1 into same space as the join, work 2 dc in next dc, *work 1 dc in next dc, work 2 dc in next dc,* repeat from *to* to end, join with a sl st, into the ch 1, (36 dc), finish off leaving a long tail to sew eye onto hat
Eye Lashes: Worked across opposite arch to the long tail
Row 1: join in yarn with a sl st and ch1, work 1 dc in next dc, work 2 dc in next dc, work 1 dc in each of the next 2 dc’s, *work 2 dc in next dc, work 1 dc in each of the next 2 dc’s,* repeat from *to* approx 2 more times for width desired
Attach Eyes:
Lay hat flat and sew on eyes to front of the hat in an even manner
See video tutorial for color choices and eye placement